Search This Blog

Thursday, April 28, 2011

Front Deck Taking Shape

This is an exciting post..   Its funny how something as simple as a single skin can change the whole look of the airplane.  This thing is coming together and looking good.  Here are some pics after I got the front deck installed and the top skin on.   Note the Brake reservoir on the firewall (opposite where plans call for it).  Also, note the panel in place.  When I put the panel in place without the skin on, the edges floated above the side rails nicely..  It seems the top skin sucked the whole assembly down so tight that I had to remove metal on the edges of the panel to get it to fit appropriately.  Don't mind the cutouts on the panel.  They aren't in any kind of accurate placement and aren't predicting what my panel will look like.


In getting to this point I fluted both the sub-panel flanges and the firewall flanges.  Also, note the bend in the firewall.  Some people pre-bend it some don't.  I put some pressure where the ribs are to get a bit of a clean bend, but other than that the bend is natural..

Wednesday, April 27, 2011

Front Deck Continued

Continuing on the front deck I temporarily attached the top skin (the last skin !) so that I could match drill the canopy mounting ribs in place.  These need to have the skin clecod on so that the correct angle can be achieved.  A similar process will have to happen with the hat section and center rib, but that will have to wait until the Finish Kit arrives.  Next step is to mount this assembly on the fuse and match drill the entire thing along with the forward top skin to the Firewall..


Not Pictured, but I was also able to final rivet the armrests.  Things are really starting to come together strongly now.  Each new piece riveted in structure provides additional strength and rigidity..  

Monday, April 25, 2011

Front Deck Continued

I have been putting more time in on the front deck.  With this piece I think the directions are more guidelines than anything, especially since they are telling you to work with a part that doesn't even come with the fuse kit.   The "hat section" as they call it comes with the finish kit so you just have to work around it for the time being.  I am deburring and prepping the parts, putting some special bends into the sub panel, and building the "gap seal" which supports the weather strip under the leading edge of the canopy.   All coming together well and looking good.  I will fit this onto the fuse, then drill the top skin as I am drilling other critical components to make sure it all lines up appropriately.

What the heck, just putting in another picture of the brake assembly for good measure..

You can't see it very clearly, but the sub-panel center section and sides in both pictures below have a slight bend in them.

Sunday, April 24, 2011

Back to the Brakes

Since I got my Bonaco hoses, I took another look at the brakes today.  I was able to mount the reservoir and the parkiung brake as well as connect all fittings.   Nothing is torqued at this point, but it is fitting together pretty well.   I also got my pedal extensions from JD Air Parts and mounted them.   These are the newer models that have two clamps in the back and I wasn't sure if I mounted them upside down or not since there were no instructions.  Either way they hold very securely so I am fine for now..  Will check it out down the road and make sure I have them right.  Anyway, after my session today the interior brake components are pretty much complete.

One thing to note is I put my reservoir on the pilot side since I don't have any passenger brakes.  This makes for shorter hose runs and a more simple set up.  I confirmed with a few other builders that I won't run into any troubles with this alternate reservoir location when I get into the firewall forward.   I will take some pics of the reservior today and post.  It is mounted on the other side of the firewall when looking at the pictures below.


Thursday, April 21, 2011

Front Deck

Today I started some initial work on the front deck.   My focus was the panel support angle.  This is a bunch of work and is actually pretty cool when it is done, but there is no way I can think of to make this an easy piece of work.  First I cut the angle, which by the way the plans indicate are "scale", but they aren't..  You need to be careful there.   So I measured the angle and cut it to length.  Then measured each scallop and drilled a 1/8" hole through the angle.  Measured exactly 1/4 inch on the edge centered on the hole which made for a 15 degree scallop.  You can see the holes and my tick marks for the angles in the first pic.  Then I used my articulating mitre saw at 7.5degrees to cut down the edge of the angle to the hole.  I did this for all the holes, then flipped it and did the other side.  It came out pretty clean and will need a bit of deburring, but all in all it worked great..   Drilled it to the panel and it turned out pretty darn good.  


Monday, April 18, 2011

Heat Box

I was out of town this weekend so not much work on the project, but I did start to fit together the heat box I got from Vans the other day.  Some people upgrade to Stainless on these for more fire protection, but this is the standard box that Van's sells and if you buy the "kit" you get to put it together and also same some $$..  This only took about 1/2 hour and saved me about 30 bucks..  Not bad..  I may replace the "door" on this box with a stainless piece of sheet..  In my mind that would add all the protection anyone would need, plus be much cheaper than other alternatives.

Wednesday, April 13, 2011

More on Interior Paint and some brakes

I have decided to go with a different color on the roll bar and side rails and top cross member of F-705 as I think the contrast will look great...  I am still using the two part Sherwin Wiliams Genesis paint and loving it..  But now have gone to the Satin Black for these pieces.  It is really beautiful and hard as a rock.   Coats easy with no runs, but takes a couple days to dry..  Also, since I am doing the painting in the uncontrolled environment of my garage and the side of my house I have had a few floaties and even a bug or two walking on my paint.   It frustrates me, but the casual observer won't even notice.   All in All it looks great and I am really excited about how the interior is now turning out...  This has been one of the toughest parts of building for me, just determining what the inside is going to look like.   Haven't even thought about the oustide.  Not looking forward to that at all...

Also, I did some final work on the brakes..  I went ahead and riveted them as well as bolted them into the pedals..  In aviation, everything is about attention to detail.  These cotter pins are done via the "FAA Standard" method and are perfect..   ;-)  Brakes are now ready for the Bonaco Tubing expected next week.  Also, I have identified the spot for the Grove Parking brake..  That will be installed end of next week.

Friday, April 8, 2011

Roll Bar complete, movin on

I am still working away, just haven't updated the blog.   The Roll Bar is complete as far as I can take it for now, so I am moving on to next steps.   In this case that is backwards to an extent.   I didn't paint the interior of the F704 and F705 bulkheads with topcoat.  I am removing everything from the interior of the plane and getting this done now.   I am also going to take care of the side rails and all other items that have been finished for a while but never top coated.   After a few painting sessions and putting things back together, the interior should look much more complete.

Friday, April 1, 2011

Roll Bar Continued - No Foolin..

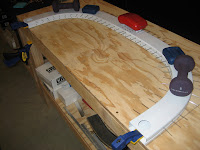
The Roll Bar is looking good but of course is taking longer than I expected.  Over the last few days, I was able to rivet the front 1/2 (forward half) with my rivet squeezer while the bar remained clamped to the table.  After measuring the width of the bar, the squeezer rested at a perfect height on the table and I fired away at the solid rivets riveting the internal straps into place.   After that I added the other 1/2 (rear half) of the roll bar and through working with my hands and smacking with a rubber mallet got the holes to align perfectly.  I then inserted all the pop rivets in place before riveting to make sure everything was truly in line.  While clamped and measured width yet again I pulled all the rivets.  I removed the clamps the roll bar sprung slightly tighter (narrower) by about 1/32 of an inch..  Just barely, but it did move..   I rushed to fit it on the plane to see its width and with the exterior angles in place it fits almost perfectly.  Probably about 1/32nd off, but I am sure that much flex can be taken up by the bolts when torqued...   I am happy...

After that I started working the attach angles.  I clamped them in place at the bottom of the roll bar per plans and drilled them for the keeper rivets.  Clamping them was tricky and no pictures since I wasn't proud of how I did it, but through a combination of clamps and hand holding while drilling I got the job done.  Each Side turned out exactly the same so I am assuming I did a good job.

Then I sat the structure on the fuse to measure height..  It looked really cool, but was almost 1/4 inch high at the center.  Lots of filing and fitting of the role bar to lower it appropriately.


One thing I am trying is I left the roll bar legs long where some people cut them to plans.  Basically my thought is I will trim only the areas that interfere leaving the other areas long which will end up covering more of the eyesore that typically is exposed when this piece is complete..  Well see how low I can get the actual roll bar exterior to cover the mounting angles..

Places we have been in our RV-7 ! (Blue 2013, Yellow 2014, Green 2015, Purple 2016, Red 2017)